Showing posts with label raku. Show all posts

Sunday, 20 October 2019

raku event!

In preparation for this year's October raku event I created two simple pinch pots and left large areas on both pots unglazed with the "smoker" in mind. I have found, at other raku events, that bright colours produced a pleasing outcome, so I decided to glaze my little pots with the apple green.


The raku day really is an event: interested participants are from four different workshops and come together for a day of fun, chat, and food as we have a pot luck lunch which we casually nibble on once the pots are in the raku kiln. There were two firings planned, so there was lots of time for great company and conversation among the participants.


Once the firing was complete, workshop facilitator James Hayes turned off the gas, opened the kiln lid and pulled individual pots out of the kiln


and transferred them to the smoker. At previous raku events people experimented with patterning techniques, such as applying hair and/or feathers, spritzing with water and/or sprinkling sugar on their pots, but at this event mostly everyone just wanted pots to go directly to the "smoker" (a lidded bin full of sawdust) for carbonising.


One of the participants was especially brave taking responsibility for quickly removing and replacing the "smoker" lid (NB all safety measures were adhered to, it just looks daunting!).


After about 20 mins in the "smoker" the pots were removed and individually dunked in a bucket of cold water.


The pots could not be just left in the water or there could be a risk of a hole being burned into the bucket or the water getting too hot to cool following pots. The yard is pebbled so the pots could be placed on the ground to continue their cooling.


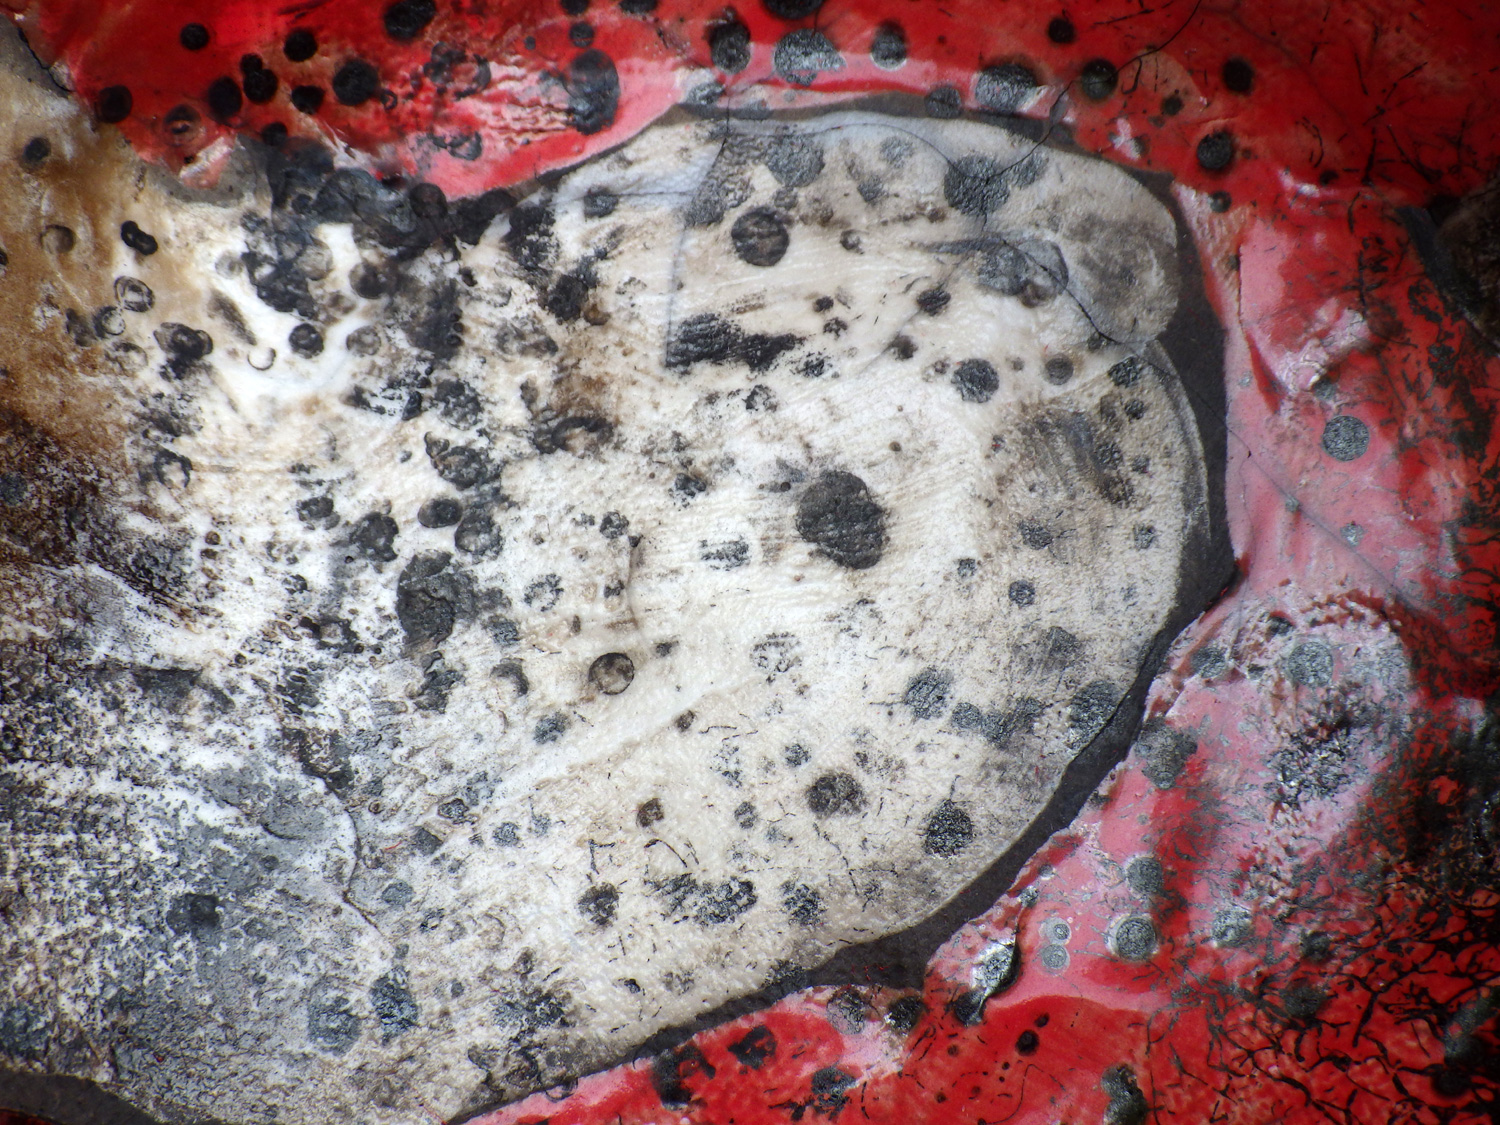
Everyone was quite pleased with how things went on the day. These are the pots from the first firing.


Wednesday, 10 July 2019

raku bowl decoration

The end of June raku event was a lot of fun and exciting. If you didn't see the post last week, you can check it out here. I focussed more on the process in that post, but now I will discuss the two bowls I made specifically with raku in mind. Both bowls are handbuilt in low-fire white clay. You can see the herringbone pattern left on the clay from the tea towel on which I rolled it. I like this effect (some tea towels have deeper patterns than others). On this, the larger bowl of my two, I pre-glazed areas in red and white and left other areas that I expected to go black in the "smoker". The black pattern on this was created with a feather, but I was disappointed that the "smoker" did not do its job - the lower area of the bowl should have been black.


On the inside of the bowl I threw large clumps of my offspring's thick, straight hair. I also threw sugar, which burned and created the black spots. There was some crackling in the glaze that allowed some dark lines from the bowl's time in the "smoker".


After a light scour with water and a scouring pad, the applied textures (sugar and hair) look more satisfying.


On the suggestion of another woman at the raku event, I painted on some India ink to areas that I wanted blacker. I was much happier with these results and it also made some of the crackling lines in the glazes more apparent.


The smaller bowl had been pre-glazed with red, white, yellow, and clear areas of glaze, again leaving large areas that I expected to turn black in the "smoker".


After I painted some India ink in areas that I wanted to be black, I was happier with the contrasts in the bowl's decoration.


I used hair that I had been collecting from my hairbrush before the event in order to get these fine and squiggly lines. I had tried a few other techniques on this bowl (a mini "smoker" using pine needles, dried lavender) but they did not produce any results. The point of raku is to be open to experimentation and chance, but if the results can be altered by India ink (or anything else!) I am quite open to that too!


Wednesday, 3 July 2019

Summer raku event!

In the ceramics workshop last week, I glazed two handbuilt bowls in preparation for the summer raku event that took place a few days ago. The patchwork design of the bowls simplified the glazing with several different colours (red, white, yellow, and clear) and leaving areas to go darker in the "smoker".


There was lots of excitement among the participants (there were five of us) on the day. We had lots of sunshine and prepared a delicious potluck lunch to coincide with the event while the first firing was on. When ready, the facilitator demonstrated decoration techniques. Water spritzed on the hot pot would cause more crackling in the glaze as it cooled.


Feathers and other dry materials could be carefully applied (don't touch the hot pot!) to glazed areas of the pots.


Even sugar could be randomly sprinkled on the pot. It would ignite and carmelise on contact with the pot, and leave dark brown or black flecks. Pots could either be decorated first and then put in the "smoker" or just simply put in the "smoker". The "smoker" is a bin full of shredded paper (or other flammable material) that ignites when the hot pots are put in it. The lid of the bin is put on immediately and the fire goes out, filling the bin with smoke. Unglazed areas of pots become black in the "smoker" and the crackling of glazes produces gorgeous black lines.


When pots are removed from the "smoker" they are dunked in water to cool off. It does not take long for them to cool enough to handle.


We were all delighted with the results of two raku firings at the afternoon event!


Wednesday, 24 October 2018

Raku event - October 2018

Members of the three ceramics workshops, facilitated by James Hayes at Signal Arts Centre, prepared pots last spring for a raku event planned for the autumn. The pots had all been bisque fired and glazed and waited over the summer in anticipation!


James had also built a new kiln from an old oil drum, bowdlerising some materials from the old square kiln. This kiln was much more efficient and heated to temperature in about an hour.


After removing one of his pots from the oil drum kiln, James gave a demonstration of some raku design techniques.


Touched to the hot pot, the feather burns a design into the pot.


Sugar can also be (gently) thrown at the pot to create random blotching effects.


The final chance possibility is to place the pot in a "smoker". Here we used a metal trash can full of sawdust and paper. Any part of the pot that is unglazed will hopefully become black in the "smoker".


From experience gained at the previous raku event, many people - including me - had been collecting hair to burn onto the pots. I collected my own hair (which is curly) from my hairbrush and also had some bits of my daughter's straight hair. After being removed from the "smoker" the pots are dunked into cold water.


It was obvious to everyone at the event that things were especially working well and there were lots of "oohs" and "aahhhhs" as final pieces were removed from the cooling water bucket.


Here is a view of my two finished pieces. I used a red and a white glaze; the black is from the smoker. As well as a crackle effect from the raku process, the designs were created by hair, feathers and sugar. I was surprised that ghostly hair effects are visible in the black areas and in some parts the hair looks metallic. I am very pleased with the results!


Raku is originally a Japanese ceramic process, the word meaning "comfort", "ease" and "release", among other possible translations. Here is another view of my two raku "goblets".