Showing posts with label hand building in clay. Show all posts

Wednesday, 3 July 2019

Summer raku event!

In the ceramics workshop last week, I glazed two handbuilt bowls in preparation for the summer raku event that took place a few days ago. The patchwork design of the bowls simplified the glazing with several different colours (red, white, yellow, and clear) and leaving areas to go darker in the "smoker".


There was lots of excitement among the participants (there were five of us) on the day. We had lots of sunshine and prepared a delicious potluck lunch to coincide with the event while the first firing was on. When ready, the facilitator demonstrated decoration techniques. Water spritzed on the hot pot would cause more crackling in the glaze as it cooled.


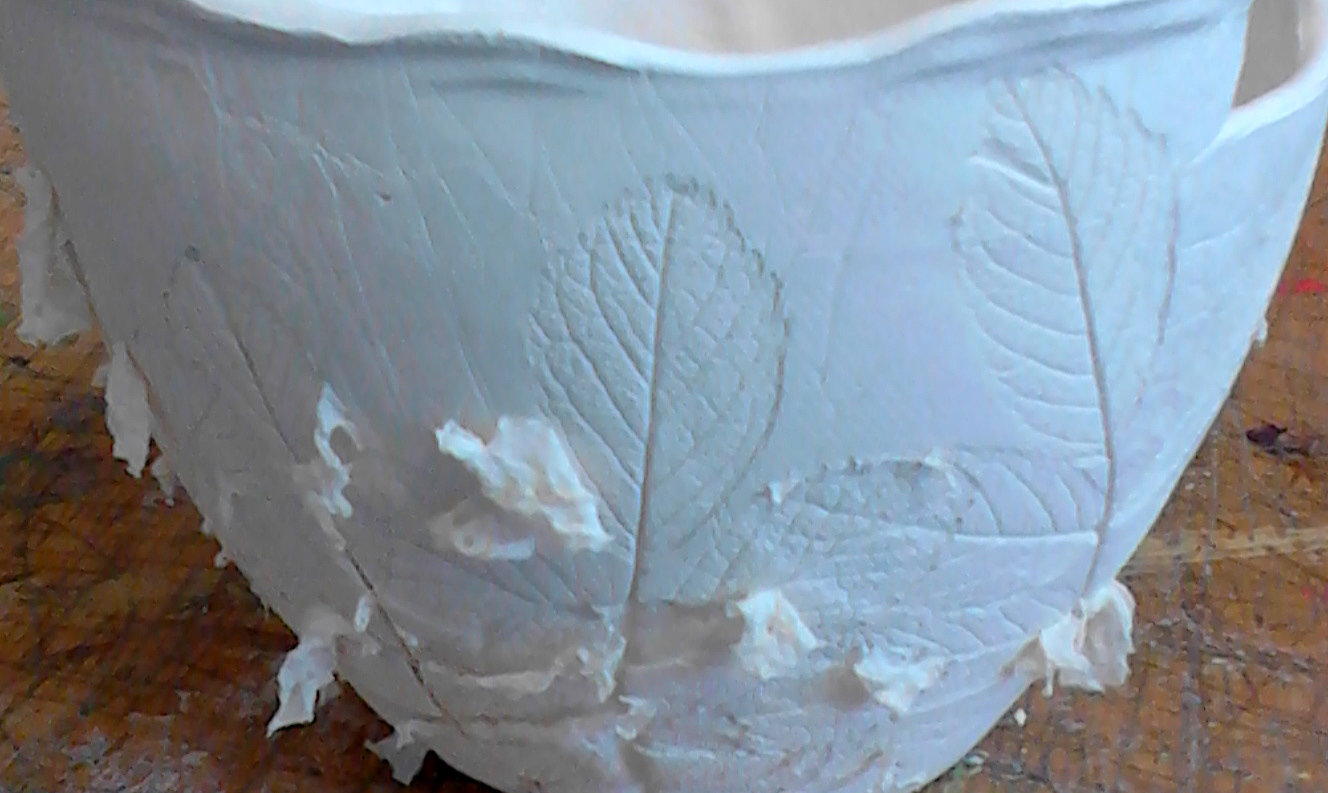
Feathers and other dry materials could be carefully applied (don't touch the hot pot!) to glazed areas of the pots.


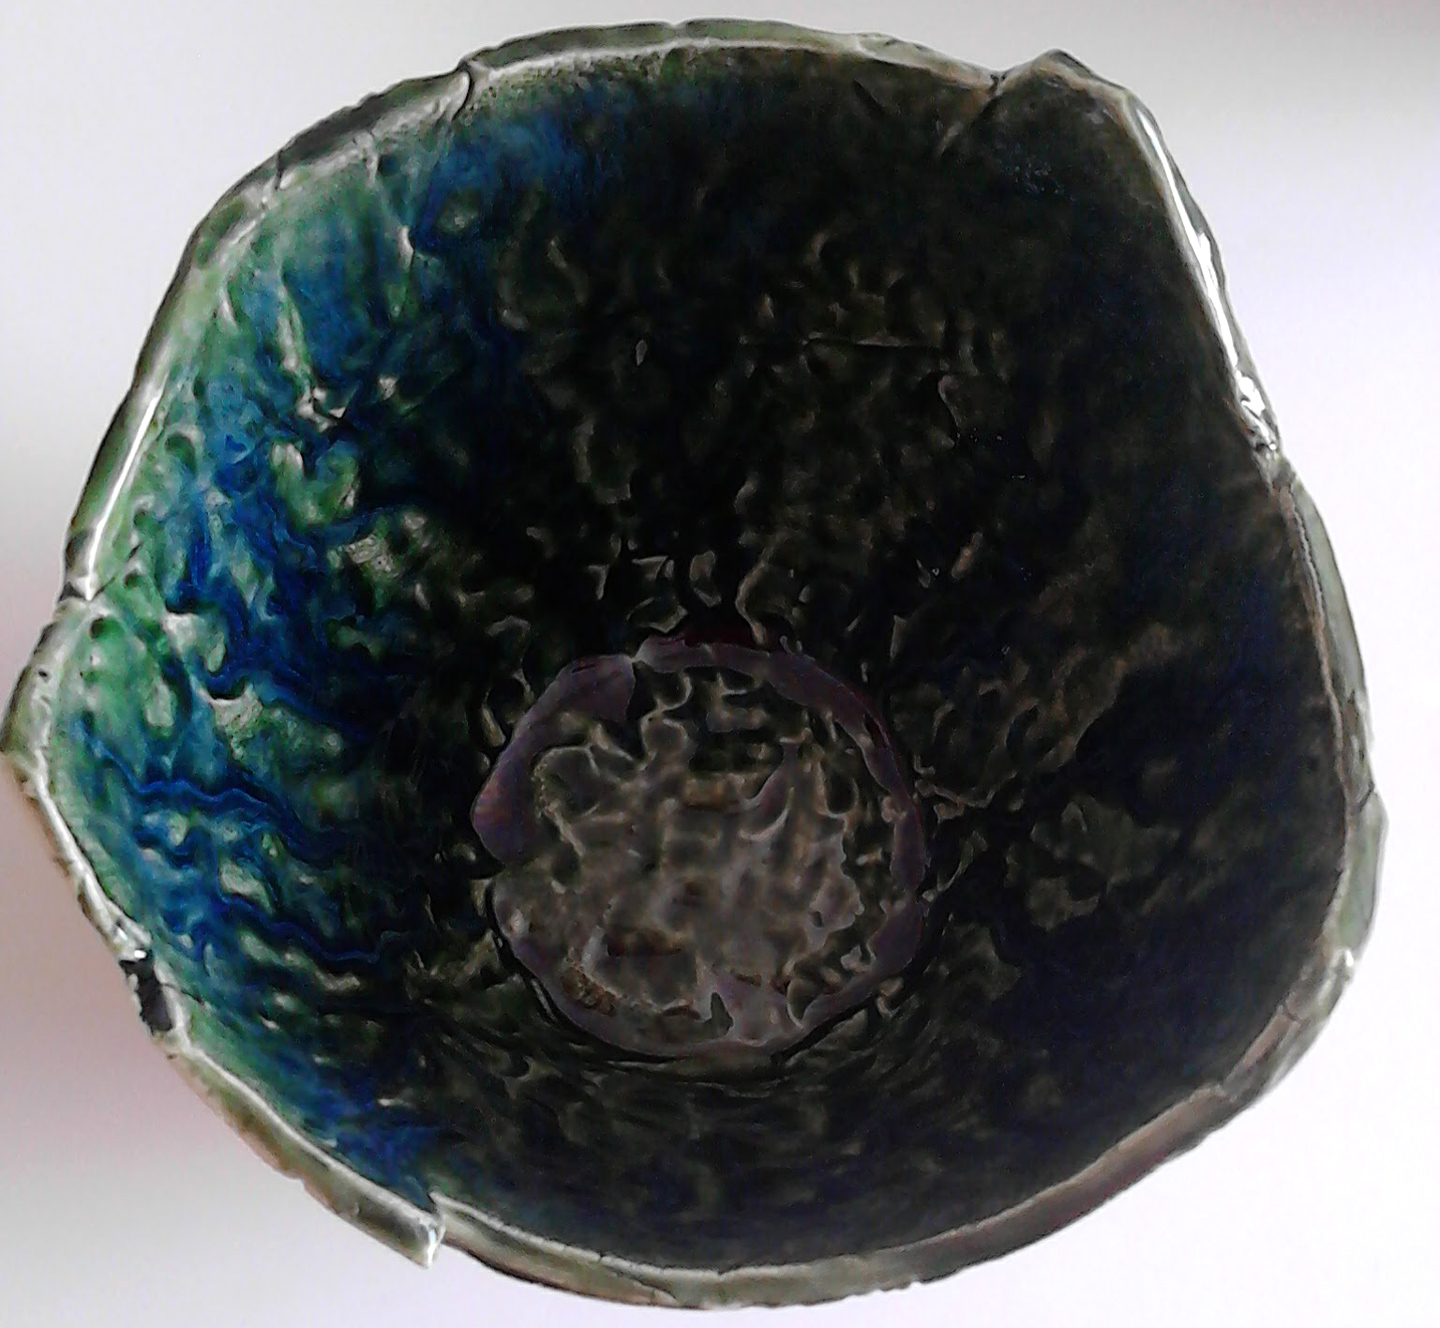
Even sugar could be randomly sprinkled on the pot. It would ignite and carmelise on contact with the pot, and leave dark brown or black flecks. Pots could either be decorated first and then put in the "smoker" or just simply put in the "smoker". The "smoker" is a bin full of shredded paper (or other flammable material) that ignites when the hot pots are put in it. The lid of the bin is put on immediately and the fire goes out, filling the bin with smoke. Unglazed areas of pots become black in the "smoker" and the crackling of glazes produces gorgeous black lines.


When pots are removed from the "smoker" they are dunked in water to cool off. It does not take long for them to cool enough to handle.


We were all delighted with the results of two raku firings at the afternoon event!


Wednesday, 6 March 2019

ceramic plates

Recently I was reading a coffee-table book on Charleston, home of Vanessa Bell, Duncan Grant, and (at various times) others from the Bloomsbury Group. The book was written by Quentin Bell (Vanessa's son) and Virginia Nicholson. As well giving me yet another peek at life to satisfy my continued curiosity about the group, I was also interested in seeing, within the rooms of the house, pieces of hand-painted pottery on tables, mantles, bookshelves, etc. Quentin Bell was the potter, but often his mother and Duncan Grant would paint the bisque ware before Quentin himself got to it (or he would leave some pots out for them). I liked seeing the pottery as I hadn't quite decided how I was going to glaze the slab plates I have made this year. This platter of mermaids is one of Quentin Bell's pieces.


Over the past dozen or so years, my annual visit to Antibes has also brought me in close contact with the ceramics of Picasso, which I also find inspiring. The Picasso Museum at the Chateau Grimaldi in Antibes has a large selection of his paintings on plates.


I thought some plates made from a low fire white clay would provide a perfect ground for painting.


Since circular slabs were simply draped over pudding bowl lids, I was able to make feet for the plates while the clay was still in its very damp phase.


I decided there was something about terracotta that I really liked and decided on using it for a set of plates. For larger plates I placed the slabs within the curve of a plate as former (cling wrapped first of course!). This meant that I would not be putting feet on the large plates, as the plates needed to dry in their former before I could remove them.


I made some smaller plates in terracotta too. As with the white ones the circular slabs are draped over pudding bowl lids. In this photo I have decided the size and location of the feet and scored accordingly.


This is a foot, made in two pieces, scored and ready to be placed, with plenty of slip, on one of the plates.


Here are the two small terracotta plates with feet attached, signed and ready to dry before bisquing.


Wednesday, 19 December 2018

Christmas Craft Fair

The xmas craft fair at Signal Arts Centre is in full swing! This year I submitted a lot of the pottery I have been making over the past year on Thursday afternoons in the ceramics workshop. In this photo six of my glaze-painted tiles, two of my draped slab "galaxy" platters, two raku vessels and a number of my handbuilt bowls are visible. The step display that the tiles are on was designed and made by my husband, James Hayes, and some of his terracotta landscape vessels are also visible on the steps.


One of my floral wrap vases can be seen on this table, at the centre of the photo. Some of my husband's versatile mini platters (can be used for small amounts of sauces, hors d'oeuvres, chopsticks, used tea bags, oven-side utensil rests, etc) are on the left.


The craft fair is set up as a shop and there is a lovely smell of hand-made soaps on entering the gallery. Display cabinets have all been freshly painted. In this cabinet I can spot a few of my pieces: a floral vase and small ginger jar on the top shelf, a glaze-painted tile and handbuilt bowl on the lower shelf.


Several more of my floral wrap vases can be seen on another set of shelves. There is a huge variety of handcrafts in the fair, all reasonably priced. The annual Christmas Craft Fair at Signal Arts Centre, Bray, continues right up till xmas eve!


Wednesday, 1 August 2018

Foliage bowls - Part 2

I was ecstatic when my two foliage bowls came out of their final firing in the way I had hoped! With ceramics there is always the chance for something to go not-as-planned, so one has to leave expectations at the workshop door and accept concepts of happy (or otherwise) accidents and random results.


My intention when glazing these bowls was that a green glaze, painted on then wiped off again, would fill the design crevices. And indeed, this worked! Some of the crevices were deeper than others (the stems) caused by me pressing the soft clay into the foliage when creating the bowls in their formers. See my previous post here for details.


Another participant in the workshop has been getting beautiful results with several glazes mixing and running into each other when heated. Although there is the risk of the glazes running too much and a pot sticking to the kiln shelf when these glazes are used on the exterior of a pot, I was hoping that there would be no trouble if the glazes were used on the inside of the bowls. There were three glazes painted on the bowl interior: a base colour of green and then more random painting strokes of a particular blue and another green.


The extra swirling effect is caused by initial pressing of the clay when creating the bowls. It is the wild rose leaf bowl interior above and the fern bowl interior below.


The ferns presented a completely different pattern than the wild rose leaves, but again, there is lighter and darker lines reflecting the depth of the crevices which held the glaze. In each bowl there is also a subtle glaze under-pattern caused by the wrinkles in the cling film from the initial forming of the bowls.


Wednesday, 25 July 2018

Foliage bowls - Part 1

In the ceramics workshop at Signal Arts Centre in Bray, I decided to try out a new way of designing handbuilt bowls.  Still using the pudding bowls as formers (lined with cling film so that the clay doesn't stick to the bowl) I brought in ferns and wild rose leaves from my yard. I rolled out slabs and cut random shapes that I pressed into the bowl formers, which were also lined with the foliage.


My plan was that I would press the clay into the foliage hard enough that the patterns would remain once the foliage was removed. Though the bowls were free standing alreay, I wanted simple "feet" on them to increase the elegance of the finished bowl, lifting it from a table surface. The feet for both bowls were made simply from slabs that curved around the bottom of the bowls and joined with the scoring, slip and vinegar technique.


Both bowls have their feet, the ferrn bowl is upside down to show off it's foot.


Though the fern bowl's foot is slightly taller, the bowls are approximately the same size at 12 cm.


I carefully removed most of the foliage before putting the bowls in the bisque firing, but any that seemed too embedded was left to burn off in the kiln. This is the bisqued wild rose leaf bowl showing the fluff from the foliage that burnt off in the kiln. This fluff is easy to remove by blowing off or brushing off before glazing. I was thrilled at the detail from the foliage, which provided a great pattern. I immediately knew how it would be glazed -- details next post!