Showing posts with label gifts. Show all posts

Wednesday, 25 May 2022

painting on glass

Some time in the mid-1980s I acquired a bunch of small glass and mirror panels (approximately 12.5 x 7.5 cm// 5 x 2.75 inches) and  had the idea to make some boxy gifts for friends and family. I don’t remember how many of these boxes I made but I never photographed them, so for the most part they are lost to time. Since this one was a gift I had given my Mum & Dad it is currently in my possession. 


I painted the open yellow tulip (one of my signature flowers) directly onto the back of the glass and then painted the image of the red-sailed boat with a star (a dream image) onto the back of the tulip so that it could only be visible from the mirror view.


I also painted this figure on a tiny glass panel around the same time and may have been intending to turn it into a gift box, although I completely painted it so wouldn't have been planning a mirror component. I painted this figure directly onto the back of the glass in a reverse method and scratched into the paint for the line work.


While I may have originally intended to create a gift box with this piece, for some reason I kept it for myself as a simple drawing. It has resided on my kitchen window ledge for decades. I have since come across the concept of "verre eglomisé" as a technique for reverse painting on glass and wonder if my little gift experiments qualify...

Wednesday, 29 January 2020

Draped slab ceramic serving dishes

In the late autumn last year I started making some draped slab serving dishes. My intention was to make them quickly and sell them at the xmas craft in December. Of course, things always take a bit longer than I expect, but they worked out fine. I had two formers, one of wood and the other of plaster, bowl-shaped and I overturned them in order to simply drape a slab over them, with a cling-film layer between the clay and the former.


I've been doing a new style of foot lately, in two pieces - two arcs making dishes "float" above a table surface.


I never took photos of how I attached the feet to the 2019 dishes, but I did for recent ones (note the date). After deciding where the clay arcs would be placed and tracing their outlines, the areas would be scored and slipped.


The feet are also scored and slipped, and after affixing to the dish, I lightly paddle them down (with a wooden paddle) in order to ensure that there is no air between the dish and the foot. This is usually apparent when some slip oozes from the joint.


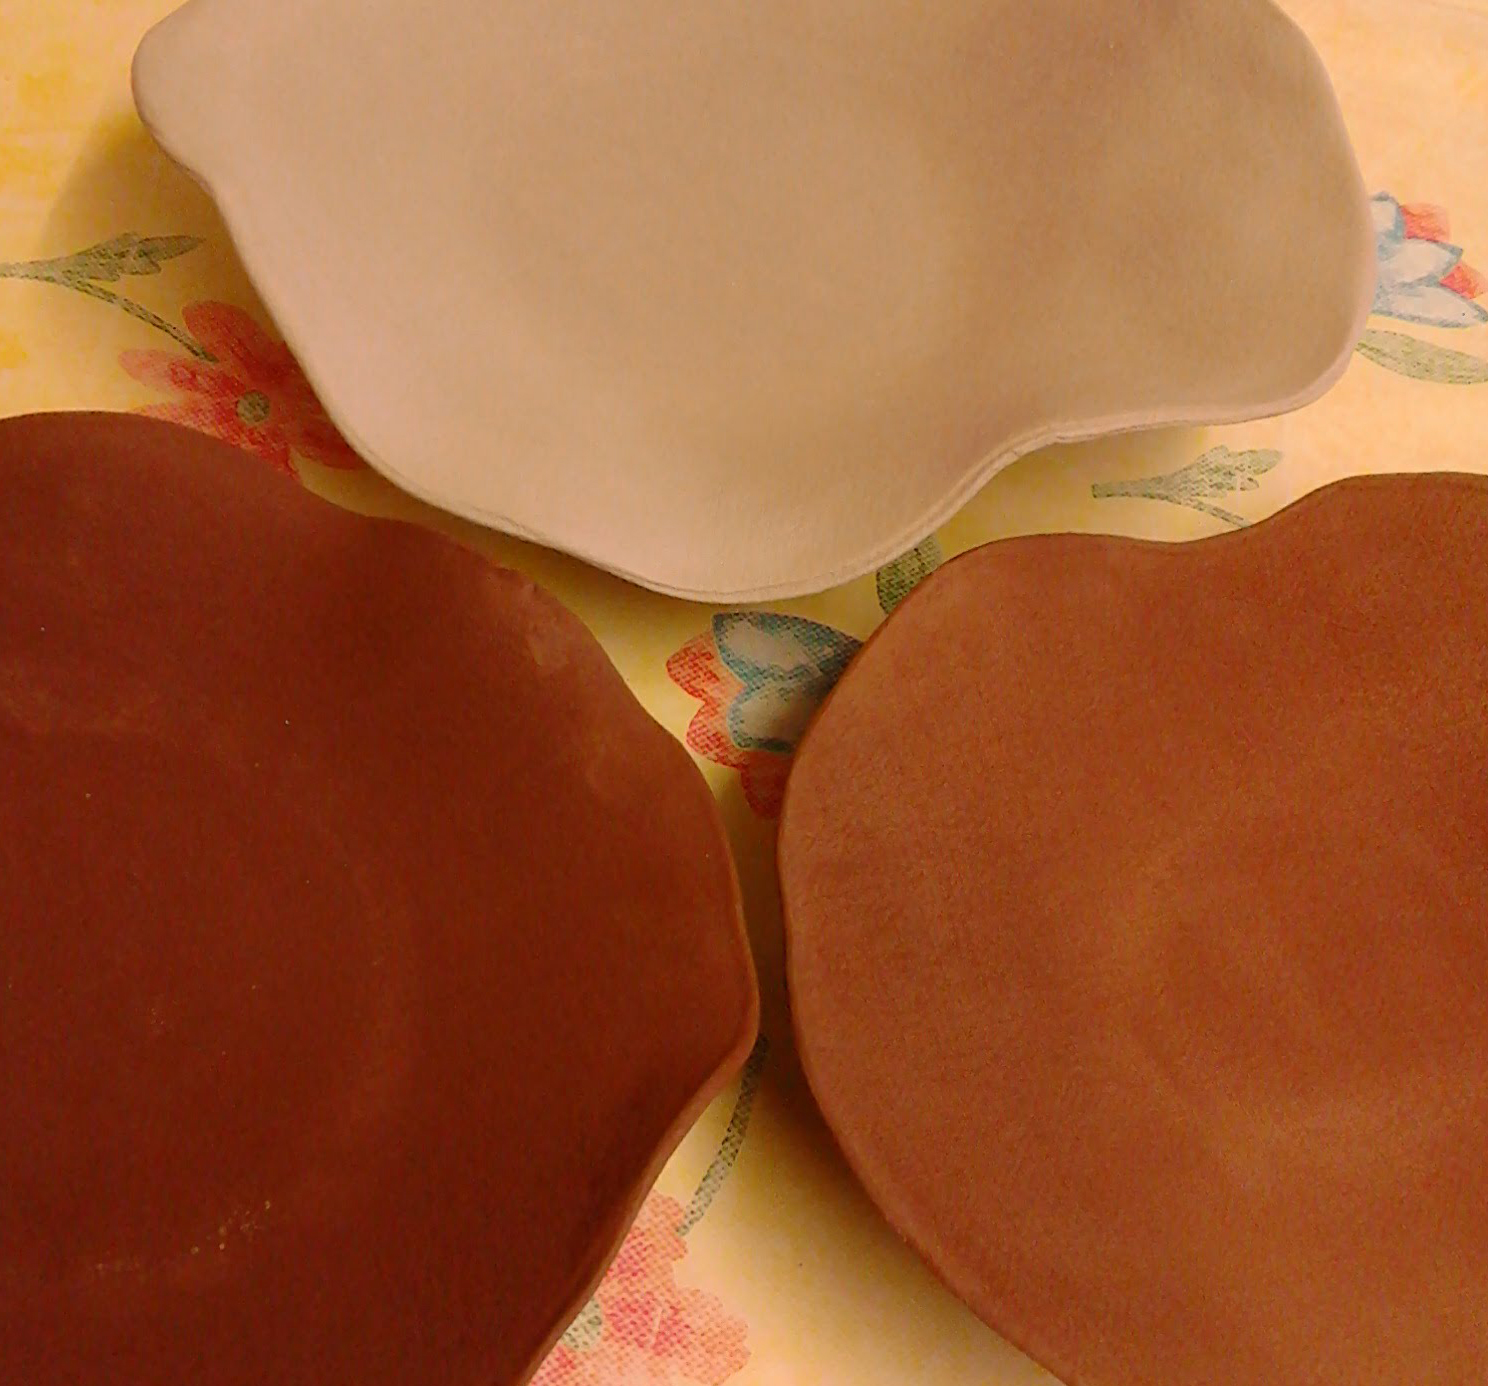
Dried and ready for the first firing, here are two terracotta and one white buff draped slab serving dishes.


After bisque firing the pots are ready to glaze. I decided to glaze the underside of the dishes so the texture when handling wouldn't feel abrasive.


Though this may look like only one glaze, there are actually three different glazes on the terracotta dishes: a base layer of cobalt blue with splashes of two runny glazes (aquamarine and sea green).


I had already witnessed these colours interacting in a lovely way, and was not disappointed.


Both dishes were bought within two days of being for sale, so again I was pleased.


While I made a draped slab dish from white buffclay, I later made two smaller dishes from grey buff. I decided, since I was including them in the xmas fair that I would glaze paint a holly design on them.


I forgot to take pictures of the finished grey dishes before they sold, but they had a white glaze underneath the holly. The white buff dish simply has a clear glaze underneath the holly design. This dish is larger than the grey ones and I'll see it again on my Christmas table setting!


Wednesday, 8 January 2020

Handbag book gift

I have made a number of "handbag books" by cutting the leather from my Mum's old handbags, which I received after she died a few years ago. I decided I would make a sketchbook for my child as a xmas present from one of MY old handbags. I chose a black vinyl handbag because of it's size (for a decent sketchbook) and because I thought it would look cool! I also thought it would be great to have a working pocket on the front cover, and there was a zipped pocket on the bag.

Of course once the bag was decided upon, the paper had to be prepared. This simply involves taking measurements and using a metal ruler to tear the paper to size for a deckled effect. Full details on the Japanese stab binding technique can be found here; this is the binding technique I planned to use for this bag. I blogged about the turquoise handbag books that I made from one of my Mum's handbags in 2018 and that can be found here.


Once I had all the paper prepared, including endpapers, I put everything together as a package and marked where the binding holes would be. The holes were made with a drill press - much easier than an awl!


Since my endpapers were yellow, I used yellow cotten embroidery thread for binding.


In order that the pocket was neat on the inside and did not cause any damage to the sketchbook paper or endpapers, I affixed some paper to the inside covers (and weighted down) prior to preparing the final package for binding.


Wednesday, 24 July 2019

Book for a friend, part 2 (of 2)

This post continues from last week's, which can be read here. I'm not sure why (may have something to do with handedness - I am right-handed) but it is good to begin with the last signature when beginning the binding. This signature includes the final endpaper, which, as you can see below, is wrapped around the signature, but it is only a partial wrap to facilitate the binding. I tied the end ot the thread that remains outside the book to a safety pin. This thread will be used to secure future threads, of future signatures, as they come its way. Always tie the threads at each end, for security, before starting to bind another signature. Glue is not necessary.


Since the very first thread journey takes the thread through the centre hole and back again into the book with nothing to stop it from unravelling, it is important to have a place holder to secure it. When I learned how to do this many years ago, another thread held the place and further binds did a chain stitch around it (then the holding thread could be removed). However, a bead works well, and I like the decorative effect.


The pins are, of course, removed as one is working. The post last week detailed the thread journey for binding. For this book, however, I made the executive decision to use the same binding journey as on the last page. I think the front endpaper prefers the security!


The leather straps are also a design feature as they are unnecessary to keep a soft leather book closed. They should be in place as one is binding, otherwise trying to push them through the spine's thread spaces at the end is difficult and painful! (though do-able) Also please note that the straps don't need to be untied each time the book is opened; they can just be slipped down over the corner ends to open the book, and then slipped back up to close the book.


As the yellow beads are larger than the beads I normally use, I decided to only use three. I still threaded through the previous bead when I was not using a bead, so the beads are all connected.


This is the finished book, showing the front endpaper.


Wednesday, 17 July 2019

Book for a friend, part 1 (of 2)

After many years, I have recently been back in touch with a dear friend and have been enjoying our regular email correspondence for several months. As a poet, whose work I admire, I wanted to make him a gift book. This has been on my mind for awhile and has all just come together in the past few weeks. The first thing when making a book, is to decide the purpose of the book, its size and materials. I had a notebook/journal in mind, so rooted around my supplies and found a nice piece of black leather for a soft cover and some extravagant yellow paper that would be perfect as endpapers in a variation of medieval tacket binding.


I also verified that I had yellow beads to embellish the spine and yellow cotton embroidery thread for the binding. The next step was to do some fiddly measuring and poking holes in the spine. The spine will be approximately 4.5 cm and 5 holes need to be punctured per vertical line and correspond to 5 holes on horizontal lines (some of these will be the same hole); these are binding holes. There will be 10 signatures (folios of paper) altogether in the book, and 2 signatures will be bound in the same holes. One set of 5 holes will be central, on a horizontal line. There will be 2 horizontal lines, each containing 5 holes, at either end of the book (top hole approximately 2 cm from the edge of the leather). This may sound complicated, but it makes sense when it is seen. I use safety pins to keep the holes open as they tend to close up in leather (they are small holes). The photos I took while making a vinyl book for another friend illustrate this point very well and may be found on this post.


A piece of graph paper as a template will help ensure that all the signatures have holes in the same place, corresponding with the holes made on the spine. In this post I did a few years ago, I include a picture of several of the supplies that I use regularly (mat cutter & mat, signature cradle, bone folder, etc.). I also have a FaceBook page, Bookbinding for Personal Use, and I know I have given details in the past of how to make a cardboard signature cradle, which is easy to make and very handy (you can of course use the design to make a sturdier, permanent cradle from wood).


Once you have the signatures (including the first and last wrapped with endpapers, such that the fancy paper wraps around the signature, but only partially).


Here is a diagram of the journey the thread will take binding the signatures to the leather. Note that the furthest holes on either end (where the thread journey begins!) do not correspond to holes in the leather, they are used to bind the signatures together at top and bottom. The purpose of the first bead is a placeholder as the thread must return through the same hole it came out of, and if there was no placeholder it would just come undone! You may deal with this by having a temporary thread holding the place instead of a bead and creating a chain stitch with future signatures (this was how I first learned to bind) but I like using beads for their decorative effect. With future signatures I continue to add beads even though they are unnecessary as placeholders. I will continue in the blog next week to show the book's development and the finished book.


Wednesday, 23 March 2016

Small gift works

More frequently in the past than nowadays, I would make small works of art as gifts for people -- close friends and family. Most of the time these gifts served the same purpose as my card-making does, i.e., to figure out something prior to a series of works or as a continuation, on a small scale of an idea that is current.

Recently my mother returned a small piece I had given to her in the 1980s as she was running out of storage space. I was doing a lot of work based on dreams and made several gifts in this series, where I painted on glass and painted on the reverse side so that the image would be visible in a mirror behind the glass. The glass and mirror components would be held together within a colourful box frame, like so:


My "Grey Box" find of last year revealed the plans for several of these works.


I am pretty positive the one given to my Mum & Dad was the first.


Here is a detail of the piece above, in which the reflected image of the boat and star are apparent.


I know I made several in this series but cannot remember who the recipients were! The following 3 plan drawings may or may not have been realised as small works -- I don't actually remember. I was planning to paint the frames blue (for water) but obviously changed my mind (at least with the piece that had belonged to my parents).


Also in the mid-late 80s I was doing a lot of symbolic figure drawing. I am sure I planned to frame this piece, but I don't think I had planned to have a mirror behind it.


I must have had a collection of glass panels, as I painted this figure on the same size glass as the mirror piece above. I scratched into the paint from the reverse side. 

Wednesday, 9 December 2015

Christmas Cooking - Cranberry Clementine Conserve with Brazil Nuts

I have been very busy with college work, so am behind in my annual Christmas cooking. But finally, last weekend I got started when I saw that cranberries were available in the grocery. At this point I no longer follow the original recipe, but do everything by eye. However, if you have never made this before, follow the recipe and then make your own adjustments for flavour, sweetness, yield, etc. So here is the recipe:
3 clementines, 1 lemon
1.75 -2 cups water
6 cups cranberries (2 standard packages)
3 3/4 cups sugar
1 cup chopped Brazil nuts

I used 3 x 250 g pkgs this year. It helps to spread the berries on a cookie sheet and pick through them, discarding badly blemished and/or mushy berries. My rule of food: if it doesn't look like you'd be happy to pop it into your mouth, you don't want it in your cooking.


It's easy to just pop berries that you're happy with into a bowl of water to give them a little wash.


This year I used between 100-125 g of Brazil nuts, and just gave them a quick whizz in the food processor to chop them finely. Put in a bowl and set aside.


 It's easiest to peel the lemon and clementines before juicing. Cut the zest finely in slivers. Juice the citrus fruit and set aside.


The citrus zest slivers are added to the water in a heavy bottom cooking pot. Cover pot and cook over low heat for about an hour. Check on pot during this time as the water should not be boiling madly, but simmering and you don't want the water to boil away.


Add the cranberries and cook gently. Berries will start "popping" after about 20 minutes; stir regularly and you can help them get jammy by squishing them with a wooden spoon.


Stir in the nuts.

Add juice and sugar and bring to a rolling boil, stirring constantly until conserve thickens. A tip I got somewhere years ago is to warm the sugar before adding to jams. I do this by putting into a bowl and sitting it in the top part of the oven (in Ireland the grill part, not turned on, but getting the heat from the main oven which is sterilising the jars).


There are different ways of sterilising jars. After washing and rinsing, I bake my jars for at least 20 mins at 200 C. Primarily I am using standard jam and mason jars that I brought with me from Canada, so the lids are being sterilised by boiling for at least 5 mins while I am doing everything else. Another tip: only add a small bit of hot conserve to hot jars at first to ensure that the glass doesn't crack. When it is apparent the glass is not going to break, fill jar leaving some headspace and seal using matching lid. If using recycled jars and paraffin, let the conserve cool a bit before pouring in wax; twirl jar a bit so that wax crawls up the sides of the opening, creating a full seal.


The yield for the recipe above is about 6 fancy jam jars. The one with the tin foil, is actually a larger jar, so I would have had 6+ jars. As a matter of fact, I used more berries than the recipe called for and I could have added more water than I did, which would have increased my yield. I have found that I can add more water and the conserve sets pretty well, though the colour can lose some of its intensity. This batch that I made last weekend is quite thick, but still spreadable. It is quite tasty and tart -- a fantastic accompaniment to turkey and turkey leftovers in sambos (mmm, toasties!) but I have also given this conserve as gifts to vegetarians, it is wonderful on toast too, just used as a jam.


Wednesday, 1 April 2015

Making Books!

There are a few special occasions coming up, so I wanted to make a few leather sketchbook/journals. These are a handy size, less than A5. I coordinated the bead decoration on the spine with the embroidery thread for binding and some decorative endpapers. 


I started work on another book, with a cardboard cover. Everything is nearly ready to go!


 I thought I would make a better effort at keeping a pictorial record of how I make the books. In this picture I am simply cutting the cardboard to size (slightly larger than the prepared signatures of paper, as above). Whenever I come across pieces of cardboard in packing and see the double crease that reminds me of a book spine, I hold on to the cardboard for a future book.


The signatures are almost square, so for the endpapers I ripped to size from a larger piece of coloured paper. My trusty bone folder is great for getting a smooth crease around the first and last signatures.


I also (after years of threatening to!) decided to try my hand at a simple presentation book design, based on a book that was gifted to me about 15 years ago. I prefer to rip inside pages than to cut them, as I get a deckled edge. This helps me orient my pages in a specific direction. I am using a heavier coloured card for the presentation booklets, and am preparing the paper for making a number of these booklets. The booklets may be used as scrap books or books for specific occasions to hold photos, writing, paper memorabilia, or whatever else one might put in a presentation book!


I am using some handmade paper for the cover, and cutting it to match the paper I have already prepared.

I used the bone folder to score the cover and the pages.


Lion clips are a great help for holding the pages and cover together. I used the push pins to mark the places where I wanted the holes and made the holes with my awl tool.


Using coloured embroidery thread (all six strands - for the other books I make, I divide the thread to 3 strands) I sewed the book together, twice in fact, so that the bind is 12 strand. Below I have shown the second book I made in this way, with red thread and red card stock on the inside.


This is my  first finished book, made to this simple design. It is 14 pages, yellow card, handmade paper cover and bound by yellow cotton embroidery thread. It is A5 size and I am quite pleased.