Showing posts with label glaze painting. Show all posts

Wednesday, 12 August 2020

life during lockdown Part 2


Time during this lockdown is totally bizarre! Even things that happened recently seem long, long ago. I am just re-capping here a couple of highlights of May and June, and I feel like I am looking back at years ago. At the beginning of May I was happily working on some oilstick drawings in my studio, as part of the Memory Is My Homeland series and finished this piece, Kingswood Iris. I have previously blogged many times about different pieces for this series, and I have posted those links in last week's blog, which can be found here. I have specifically talked about Kingswood Iris here.


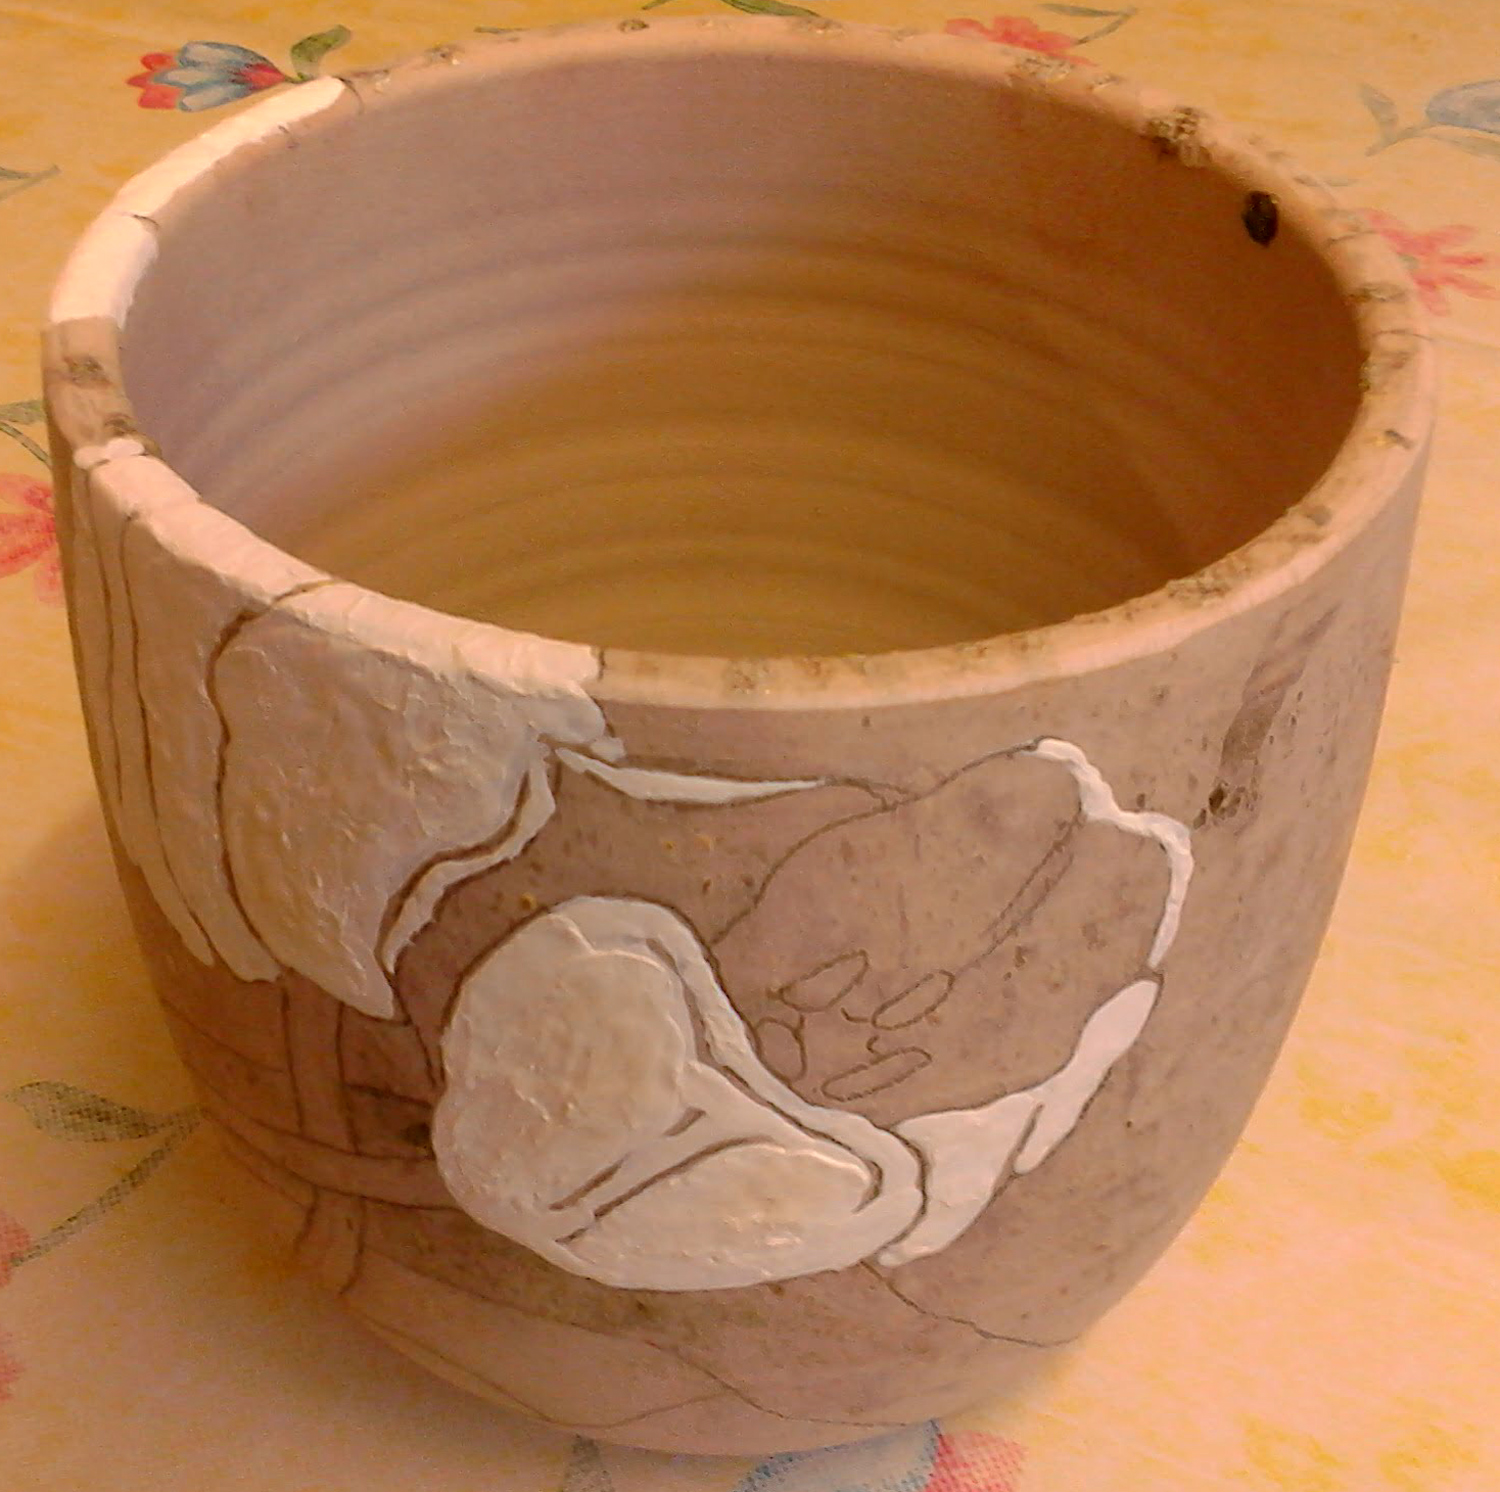
Signal Arts Centre re-opened in June so that staff could prepare for a public re-opening in July. Because of this, a number of firings were put on as there was a plethora of ceramics from the workshops that were waiting patiently since March for something to be done with them. One of the first things of mine that came out of a glaze firing, was the large glaze-painted tulip vase. Three years ago, I had meticulously painted a tulip design on a vase but the results were disastrous as what I thought was a white glaze was, in fact, a glossy white paint! The results sat idle for a number of years until I decided to revisit the vase in the New Year. I blogged about the process of reclaiming this vase here, including giving links to the initial work and failure.


In the latter half of June, I took a 2-part silk fibre paper-making workshop via zoom. I was completely unaware of this process for paper-making but loved it and could immediately see the possibilities for my future artmaking! I blogged in more detail about this workshop here.


In addition to my tulip vase (above), I also had a number of draped slab dishes come out of the kiln in June. I had glazed several of them with a crackle white glaze, the crackle in this glaze only becoming apparent after India ink is applied and rubbed off. I blogged about this process here.


Also in June, I took part in the "Grasp the Arts" campaign. The point of the campaign, for me, was to highlight the role of artists in society's general mental well-being. Many art practitioners, in the widest sense, have lost work and opportunities during the lockdown. An under-acknowledged field of work, the arts are the mainstay of civilisation and survival and it is during lockdown that people have turned to the arts for entertainment - through binge-watching tv shows, streamed music, fb & instagram music &  poetry gigs, theatre, opera, literature, etc - to mentally survive this crisis. I discuss this campaign further here.


Wednesday, 15 July 2020

tulip vase

As I realised my time at the ceramics workshops at Signal Arts Centre was coming to an end (I have many other projects that are now taking priority attention, although I foresee returning to ceramics sometime in the future), there was still the matter of the disastrous vase I glaze-painted three years ago. I described full details of this spectacular failure here. However, the vase was sanded and scoured and sitting in a corner periodically beckoning to me. Luckily I actually did return to it in February and worked on re-glazepainting before lockdown.


I still wanted to glaze the vase using the original tulip design, and I still have that design as I had been using it as reference for the tulip patterns on my terracotta dinnerware set (I blogged about the bowls here, and that post contains all the links to other parts of the set). I simply applied graphite to the reverse side of the design and traced the floral outlines,


transferring the pattern to the vase.


Then I began, colour by colour, to paint in the design with glaze.


As can be seen here, it wasn't possible to remove all the debris from the initial disaster, so I resolved to simply take the chance on re-glazing and see if these blemishes added an interesting effect to the final vase.


The underlying vase is a pale colour but I decided NOT to glaze paint any outlines on the design this time round. Though the lines between colours appear quite strong in this picture, I expected that it would be more subtle in the firing.


After the disaster of three years ago, I liked the look of the melted blue glass so did not have it removed with the other detritus. I hoped the second attempt at firing the vase would not be unkind to this effect.


I was pleased with the final results.


Signs of the first firing are random and not particularly intrusive (for instance the interior spot visible on the right side in this picture) .


Another view of the fired vase.


This view shows that the stained glass was happy enough with the second firing, showing off it's mix of several colours of blue.


Wednesday, 29 January 2020

Draped slab ceramic serving dishes

In the late autumn last year I started making some draped slab serving dishes. My intention was to make them quickly and sell them at the xmas craft in December. Of course, things always take a bit longer than I expect, but they worked out fine. I had two formers, one of wood and the other of plaster, bowl-shaped and I overturned them in order to simply drape a slab over them, with a cling-film layer between the clay and the former.


I've been doing a new style of foot lately, in two pieces - two arcs making dishes "float" above a table surface.


I never took photos of how I attached the feet to the 2019 dishes, but I did for recent ones (note the date). After deciding where the clay arcs would be placed and tracing their outlines, the areas would be scored and slipped.


The feet are also scored and slipped, and after affixing to the dish, I lightly paddle them down (with a wooden paddle) in order to ensure that there is no air between the dish and the foot. This is usually apparent when some slip oozes from the joint.


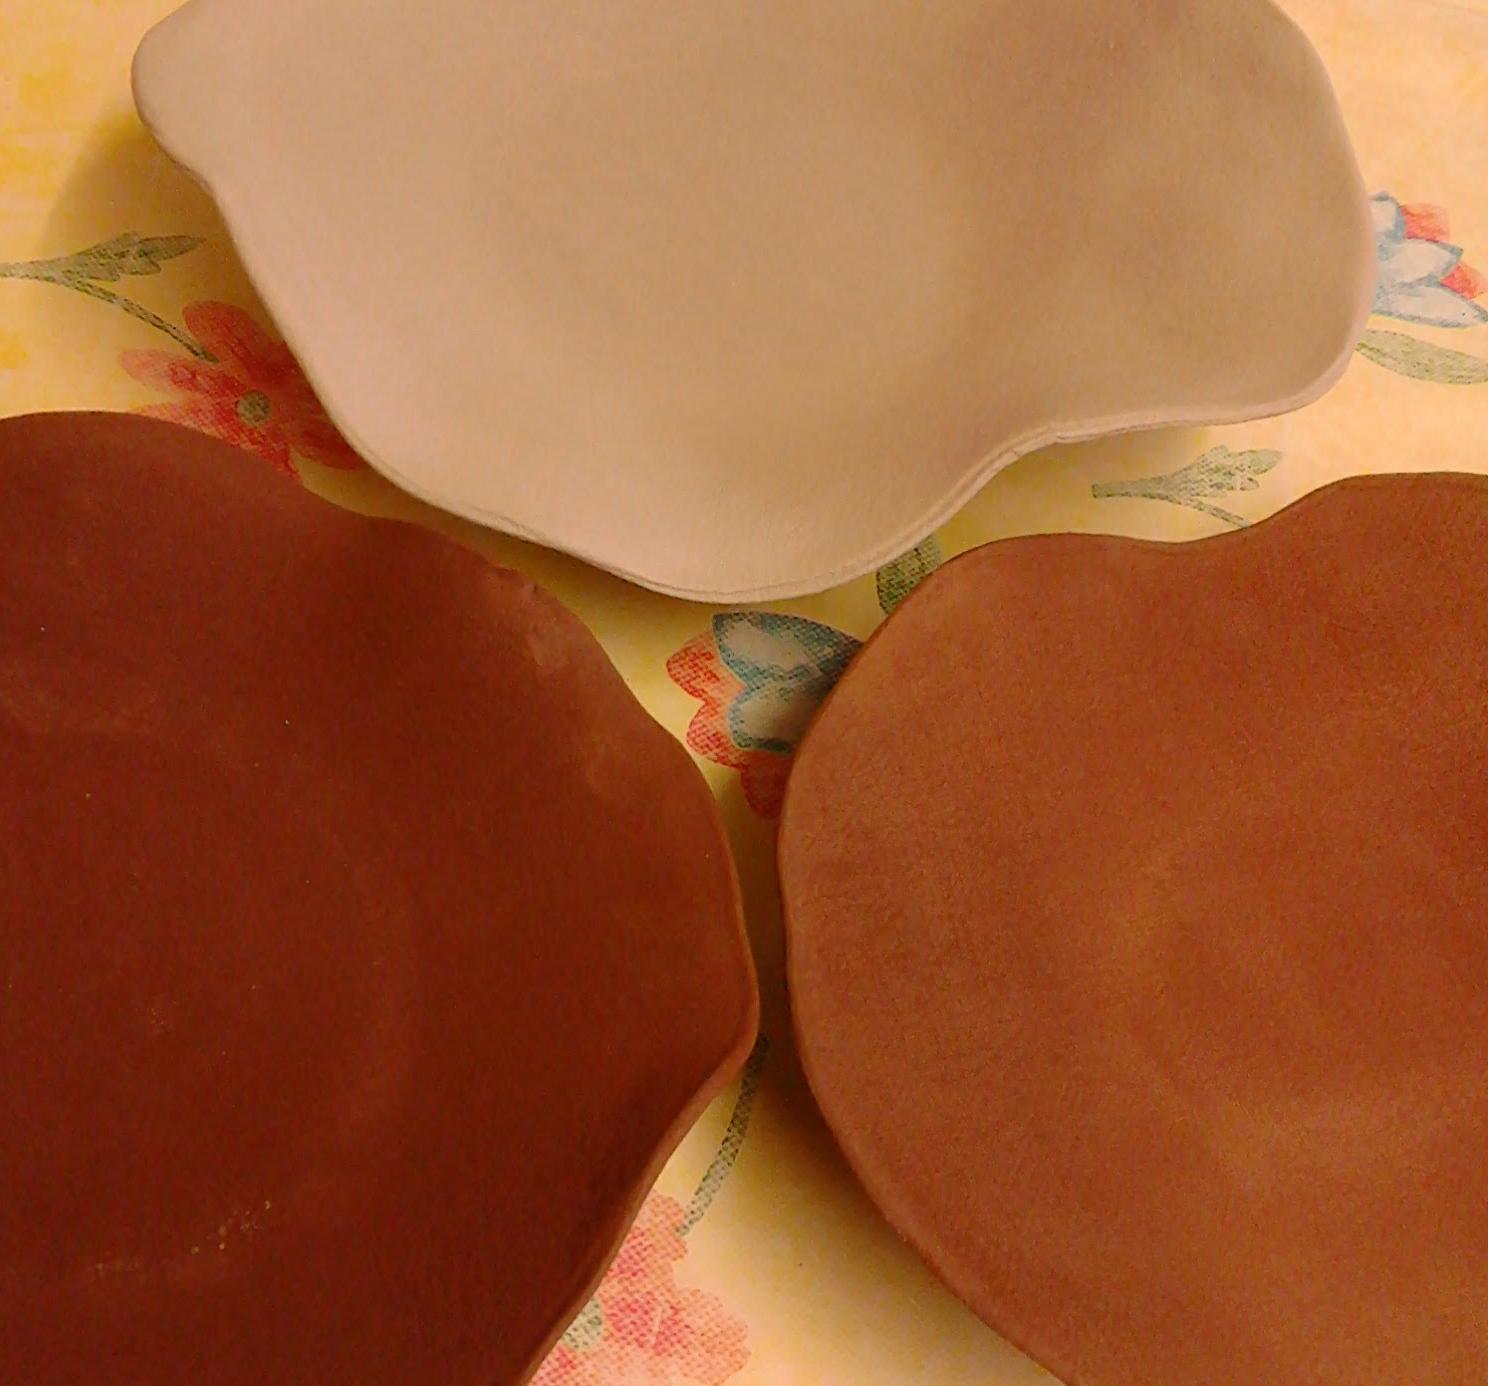
Dried and ready for the first firing, here are two terracotta and one white buff draped slab serving dishes.


After bisque firing the pots are ready to glaze. I decided to glaze the underside of the dishes so the texture when handling wouldn't feel abrasive.


Though this may look like only one glaze, there are actually three different glazes on the terracotta dishes: a base layer of cobalt blue with splashes of two runny glazes (aquamarine and sea green).


I had already witnessed these colours interacting in a lovely way, and was not disappointed.


Both dishes were bought within two days of being for sale, so again I was pleased.


While I made a draped slab dish from white buffclay, I later made two smaller dishes from grey buff. I decided, since I was including them in the xmas fair that I would glaze paint a holly design on them.


I forgot to take pictures of the finished grey dishes before they sold, but they had a white glaze underneath the holly. The white buff dish simply has a clear glaze underneath the holly design. This dish is larger than the grey ones and I'll see it again on my Christmas table setting!


Wednesday, 11 December 2019

Chrismas Craft Fair

The annual Christmas Craft Fair at Signal Arts Centre opened on Mon Dec 10 and will be open 10-5 daily (including Sundays) until xmas eve. The first thing one can't help but notice on entering the gallery is the beautiful aroma of handmade soaps and potpourri.


The galley has been transformed into a lovely craft shop and one is enticed to browse.


There is a great mix of handcrafts - ceramics, cushions, handmade notebooks, xmas decorations, tea cosies, hand decorated t-shirts, felted scarves, stuffed toys, handmade cards - the list goes on!


I contributed a number of things: handmade pocket note/sketchbooks (left), hand-painted tiles (left) and some handbuilt pottery (to the right can be seen two of my shamrock bowls), Also featured on the display steps are my husband's beaten copper tea-light holders (left) and a number of his versatile ceramic teabag/cooking utensil/key holders (centre to lower right).


Here is another view of the display steps.


There are a few more pieces of mine not on the step display - another shamrock bowl (shamrock in flower was embedded to print into the clay before bisquing) and one of my tile paintings.


As well as the terracotta blue-glazed draped vessels (which I don't have a picture of in this blog!) I made a few festive draped-slab serving dishes from grey buff and white clay.


This is a view down the hallway. The display steps are on the first white-clothed table.


This is a view of the corner of the main gallery space. Gorgeous felted scarves are on that clothes rack in the corner and copper jewellery in the centre. Best wishes to all who contributed their work to the fair. There are some real bargins here and the craft work is such a high quality too.


Wednesday, 11 September 2019

Tulip bowls

In previous blogs I have described the making of bowls and plates through handbuilding, rather than throwing on the wheel. One of my main projects this year, in the ceramics workshop, is to create a dinnerware set. Details of the large and small plates of the dinnerware set can be found here, here, here, and here. Here are two of the bowls for the set after I put the feet on them, using two thin semi-circular slabs.


When the four bowls (it is a quartet tableware set) came out of the bisque fire, I drew the tulip designs directly on them with a pencil. I talk about the bowls and my plans for glazing here.


I started with glaze painting the flowers - two different colours of yellow.


I glaze painted the leaves and stems with "tropic green" a speckly green that I particularly like, but I painted a coat of "apple green" over the stems as I wanted them to vary from the leaves, but still have that nice speckle.


Since a glaze fire was announced, I worked at getting one bowl completely glazed. The background and inside of the bowl are glazed with the same "speckled turquoise" that are on the plates.


I was very happy with the firing results of the bowl! I found out that the tropic green is one of the runnier glazes and really liked that gravity pulled it down a bit to accentuate the terracotta lines. I also enjoy the random dripping into the stem from the leaves.


Here is another view of the first finished tulip bowl. The "speckled turquoise" is a consistently beautiful colour and the interior of the bowl is very smooth.


Another view of the finished bowl! Once I finish glazing the other three bowls, I will start work on 4 mugs to complete the dinnerware set.


Wednesday, 19 June 2019

ceramic handbuilt bowls

I made four bowls to go with my tulip dinnerware set, which can be seen in progress and finished here, here, here and here. A medium-size pudding bowl was used as a former (lined with cling film of course!).


You can see the feet on the bowls are made by two half-moon, measured slab pieces similar to the feet on the small plates in the set. They were affixed when the bowls were leather hard, in the usual manner of scoring and slipping.


I drew tulip designs on each bowl's exterior. I think the interiors will be the solid speckled turquoise glaze that I used for the background on the plates (so they will also connect with the backgrounds on the bowl exteriors). The speckled turquoise glaze has a bit of a rough texture, though, so I will also do a top coat of clear glaze to hopefully smooth it out.


A glaze firing was going to be put on, so I shelved these bowls, knowing that the glaze-painting of the designs would take a bit more time than I had. I quickly glazed a smaller, simpler bowl so it would go in that firing.


This turned out to be a good plan! Using only two glazes - fire engine red for the interior and rose gold for the exterior - my small terracotta bowl turned out quite lovely. I call it Libation Bowl. Though I am sure this is suitable for blood sacrifices, it will probably get most use as a peanut bowl. 


Wednesday, 8 May 2019

Handbuilt tableware set, ps - part 4 of 3...

This is the last of the four large terracotta plates for the tableware set, it didn't make it into the previous glaze firing. One thing I realised when the others came out was that I had to apply a clear glaze on the lines between colours. The raw terracotta lines looked great but would not be useful if I was going to use the plates for dinnerware, which I am! So with the already fired plates, I just had to apply some clear glaze and re-fire. With this plate I could apply the clear glaze before going into the kiln, thereby doing the glazing in one step (as it should be).